Driving something not-so inconspicuous as the DarkStar Van, we tend to get a few comments and questions from random people that we meet throughout our travels: How much does a rig like this cost? Is that an RV? Is this a 4-wheel drive? Is there a bathroom in there?
Its great to see the interest in our mobile mountain condo, so we thought we’d start a series of posts to share our thought process and experience with van building, modification, and living. There are many layouts, materials, systems, products, and purposes available to rig up a van. The philosophy we utilized to design our van was to build a comfortable, functional, and efficient vehicle and living space. So, along those lines, here are some design considerations for you van builders considering full-time travel.
Sleepy-time – On average, people spend about 1/3 of every day in bed.  On crap weather days it could be longer. Building/stowing a bed every single day, from MtbNomads viewpoint, is an unnecessary time-suck. So, the first design consideration is a permanently deployed bed. Being able to fall out of bed into the kitchen/living room of the DarkStar Van every morning and not having to fold a bed away to begin the Morning Jet-Fuel ritual is nothing short of spectacular. It also serves as an out of the way zone for one of us or Kaylee the Dog to hang out in.
 Many van builders and DIY’sters are incorporating an elevated “panel bed design” that incorporates permanently mounted rail/support system on the walls and 2-4 removeable/stackable platform panels. One of the biggest bonuses of this type of bed design is the gear garage for under-bed storage accessible via back doors. If you are looking to store bikes (via fork mount) and other gear, plan a minimum height of 36” from floor to bottom of the bed panel. We designed DarkStar’s bed to sit at 37” above the floor to accommodate our bikes and gear below and still allow us to sit fully upright in bed.
Feed Yo-Self – Similarly to the bed setup, an efficient use of limited floorplan should include a functional galley. Turns out, you’ll be preparing & cooking meals at least two times a day and diving into the fridge for beers at least…well, you get the picture. A functional galley for full-time vanlife should include a minimum of running water, a two-burner stove, cabinet  storage for cooking gear & food, and a refrigerator. As with the bed setup, minimizing time spent deploying some contrived galley setup every time the H’anger emerges is ideal.
As with a good kitchen in a stick & brick home, we’ve built our galley to be an efficient and convenient use of space. We’ve specifically built drawer dividers to house all of our cooking gear, dishes, and various beverage containers. After finding that we were a bit short on counterspace, we added a fold-up table on the end of the galley. Our setup includes a 4 cubic foot Dometic Refrigerator with freezer.
Lets face it, a huge part of why we gravitate toward this lifestyle is the ability to be outside. So being rigged up to cook outside is a huge bonus.  There are many camp stove options available ranging from JetBoil to large basecamp burners or grills. We’ve brought along a Eureka Gonzo Grill. Turns out, this grill is the Swiss Army Knife of camp-stove systems as it includes a burner and a reversible cast-iron griddle/grill. With this little camp wonder, we’ve made pancakes, grilled meats and veggies, pizza, anything in a skillet. Another option that seems to be popping up a lot currently is the Tembo Tusk Skottle setup. Whatever you choose, its great to have the outside option – and a great backup for when your van stove runs out of fuel.
Water – One of the biggest limitations for the town run/resupply interval is the water. Its essential for cooking, washing, and making ice for cocktails! MtB Nomads tend to use an average of about 1-2 gallons per day. We’d suggest incorporating 20-25 gallons of water capacity in your build. Water is heavy (~8 lbs/gallon), but this capacity allows for a resupply run as little as once or twice per week. Of course, if you are an urban dweller, stay in campgrounds, or plan to make frequent town runs, you could do with less capacity.
With all that water you’re packin’, you need a way to distribute it. Yeah, running water is also a requirement. Being able to turn on a faucet to cook, clean, or shower is invaluable.
The philosophy we utilized to design our van was to build a comfortable, functional, and efficient vehicle and living space.
Energy Harvest – The ability to sustainably and indefinitely remain off-grid is the best thing to happen to the vanlife movement. A solar setup generally consists of a series of solar panels, a solar charge controller, a  battery bank (storage), and an electrical distribution system (fuse panel & wiring, 12v to 110v inverter). The particulars of solar & electrical setup are highly dependent on budget, energy need/demand (what are you supporting, charging, running, etc each day), and choice of products. There are plenty of people that discuss product pro/con and in-depth system design at length on the interwebs (start at FarOutRide.com), so we won’t go in depth here. As mentioned above, untethering from the grid and being able to charge your i-thingies, power the disco ball, and keep your beer cold is next level freedom. Get the solar.
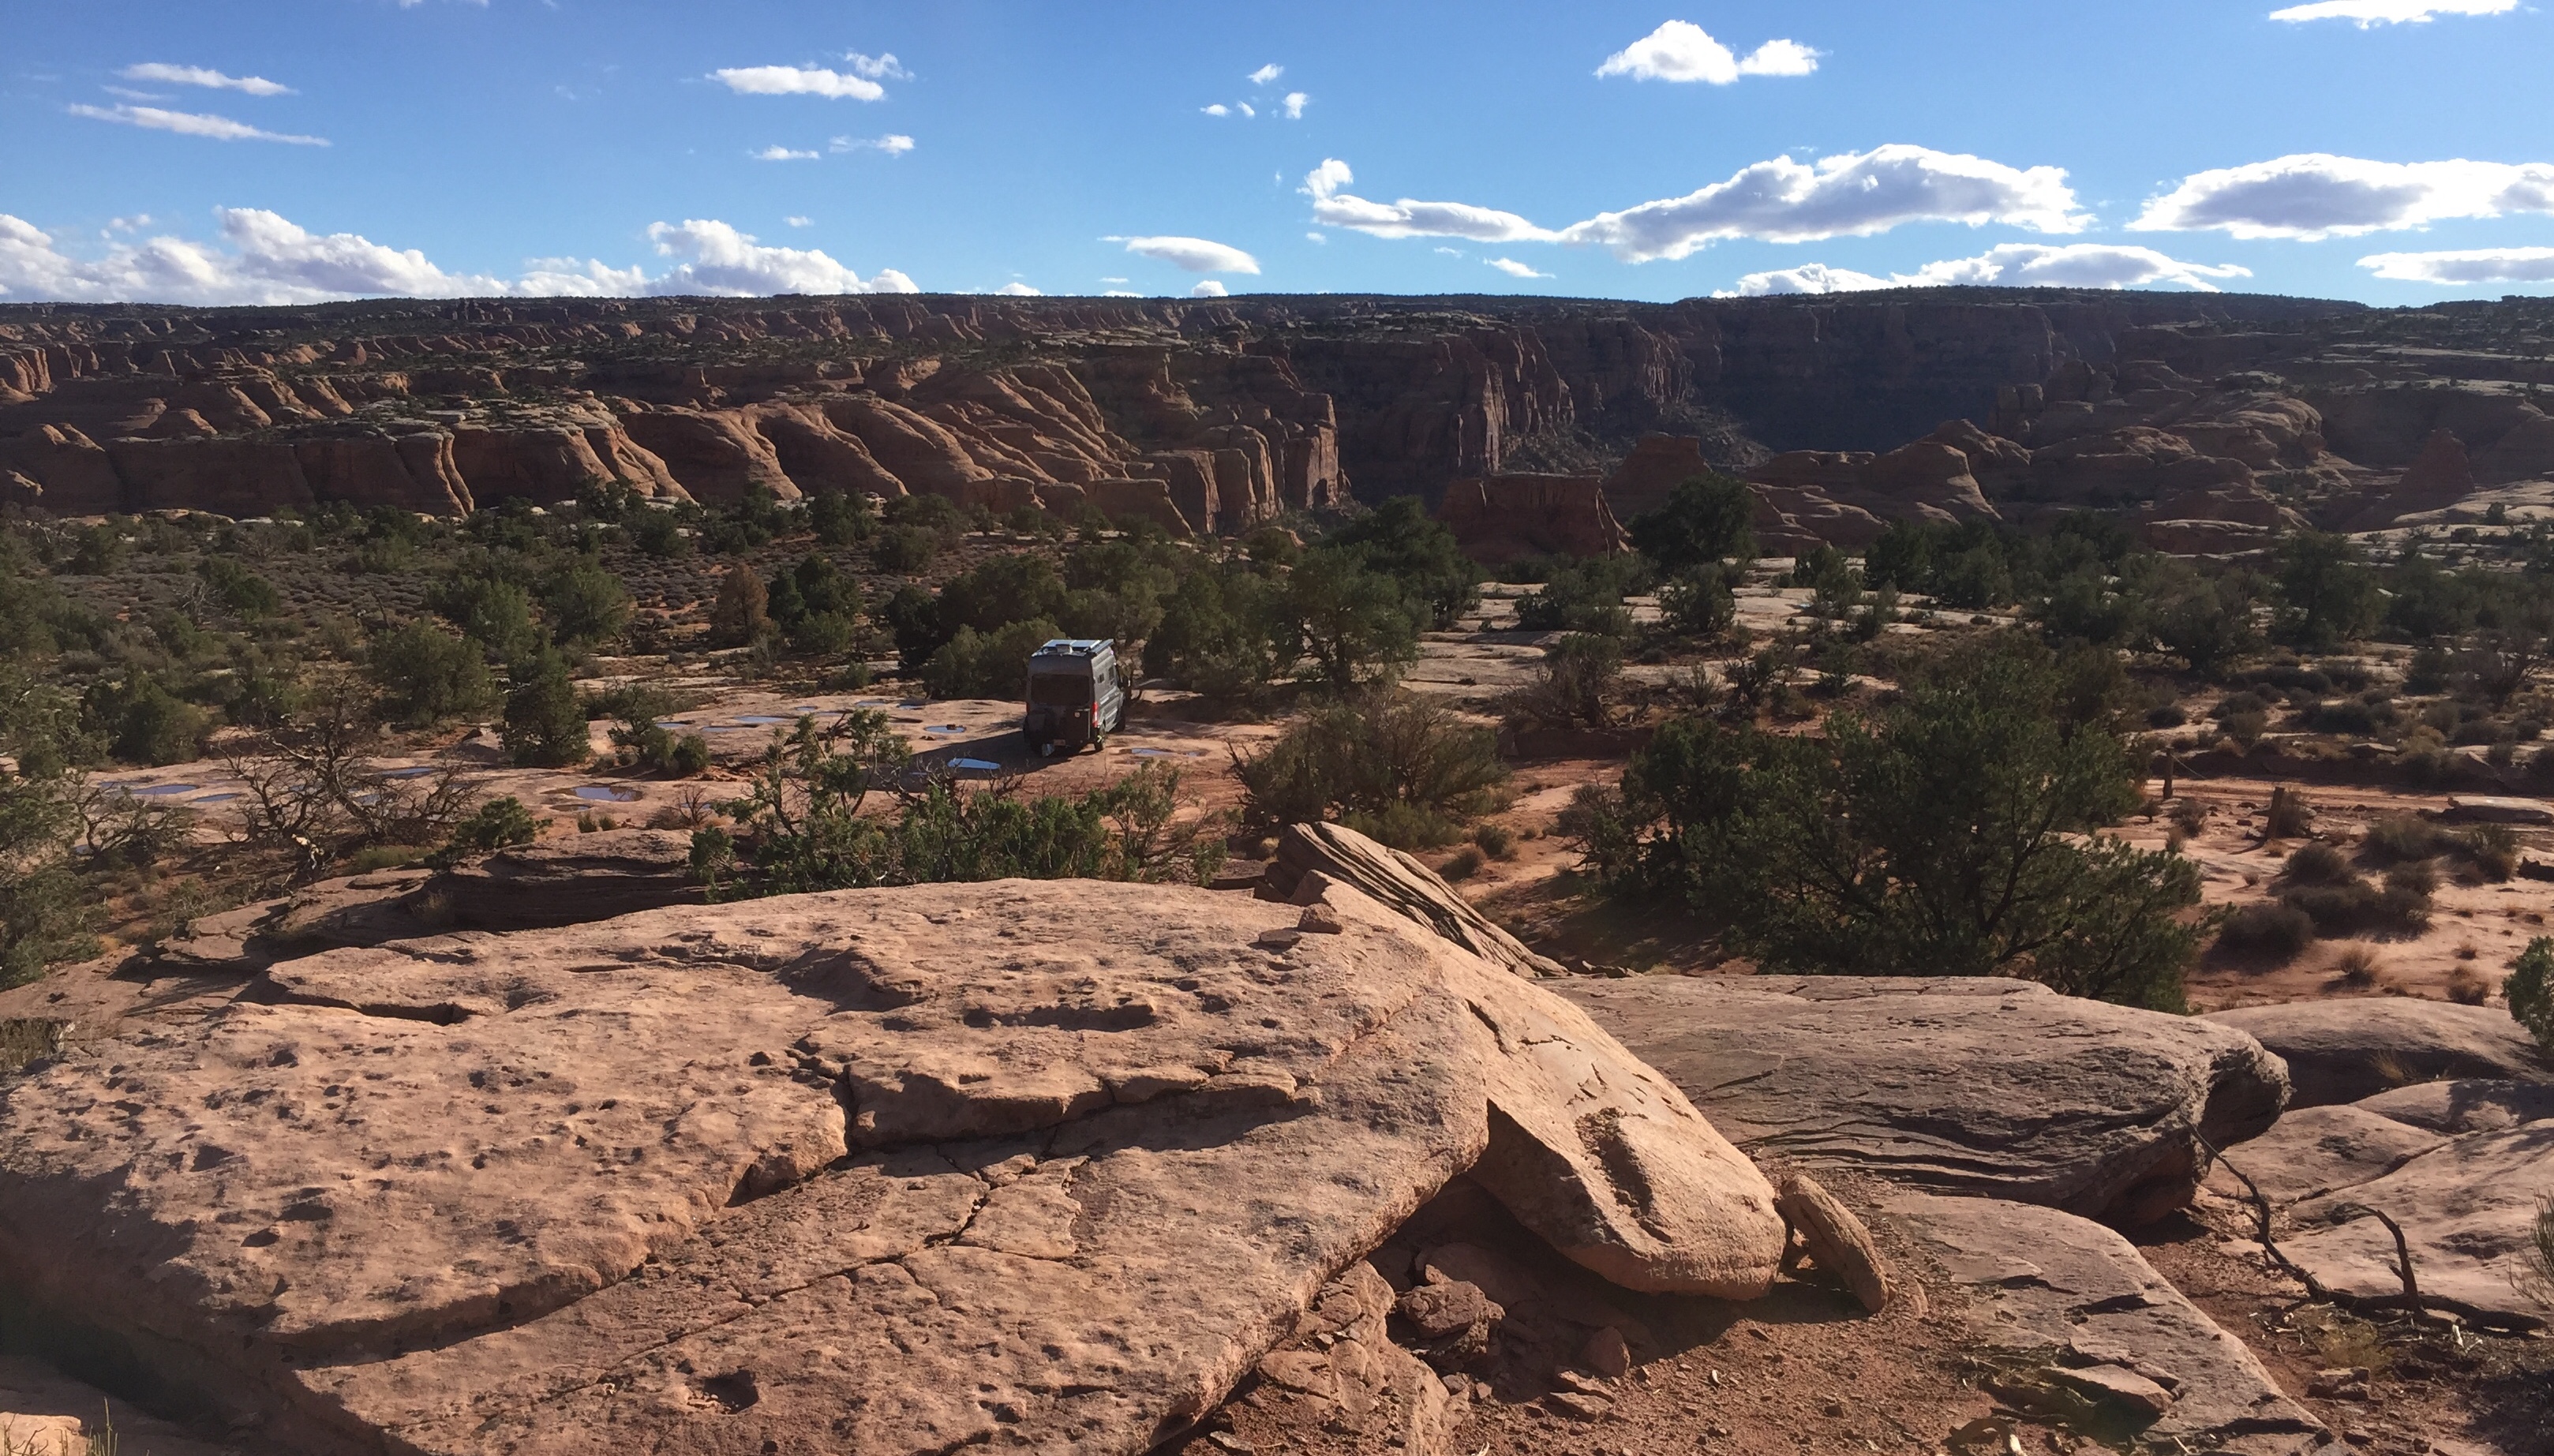
My way off the Highway – What’s the point of building an amazing self-sustaining portable basecamp if you can’t get into the wilds? There is no shortage of discussions on 2WD vs 4WD on the interwebs – this is not one of them. Instead, we’ll focus on a happy middle ground for your zombie  apocalypse survival machine. And, you’d be surprised where a van with good tires, clearance, and a good set of driving skills can take ya.
At a minimum, we suggest high quality tires with proper load range & weight ratings. The stock tires on your van are almost definitely inadequate or low quality. And, you’ll likely be shocked at the gross vehicle weight of a fully geared up adventure van. Generally a fully built and loaded van is somewhere between 8,000 to 10,000 pounds.
If you plan to leave the highway, you will want to All Terrain (AT) tires. AT tires tend to be available in height/width/wheel size, proper load range/weight rating, and heavily reinforced sidewalls for our heavy vans. And, AT tire tread is designed to for mud, sand, snow, and pretty much  everything else you may encounter on your ramble. When upgrading your tires, make sure that you also spring for a full-size matching spare. A couple of the go-to tire options that van folks are running now include BF Goodrich All-Terrain KO2 and Falken WildPeak AT3W, and Cooper AT3 XLT.
The other consideration for making your van more off-road worthy is to add a lift kit for increased ground clearance and/or fitment of larger AT tires. There are a number of companies that offer aftermarket lift kits for Transit and Sprinter van platforms (Transit Offroad, Van Compass). There are a number of shock/strut coil upgrade options (Fox, Billstein) available as well. The added belly and entry/exit clearance of a lift kit is well worth the investment if your plans take you deep into the wildlands.
In the end, your fully built van should be a behind the scenes catalyst to your lifestyle and how you use it. Hopefully these considerations help ya get there. Oh, and no, there’s no bathroom in our van.
We’ve compiled some of the van build materials that we’ve used that are available on our Amazon Ideas List.
DISCLOSURE: This post contains affiliate links. We’ve done so to aid your research in finding the proper gear. If you click a product link on this page and buy a product from the merchant, we will receive a small commission to put toward maintaining this website. The price is no different than if you were to find the gear from the vendor on your own vs using our product link.

